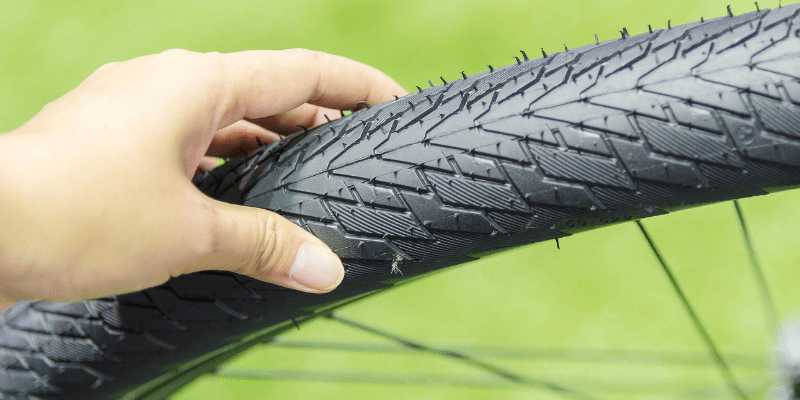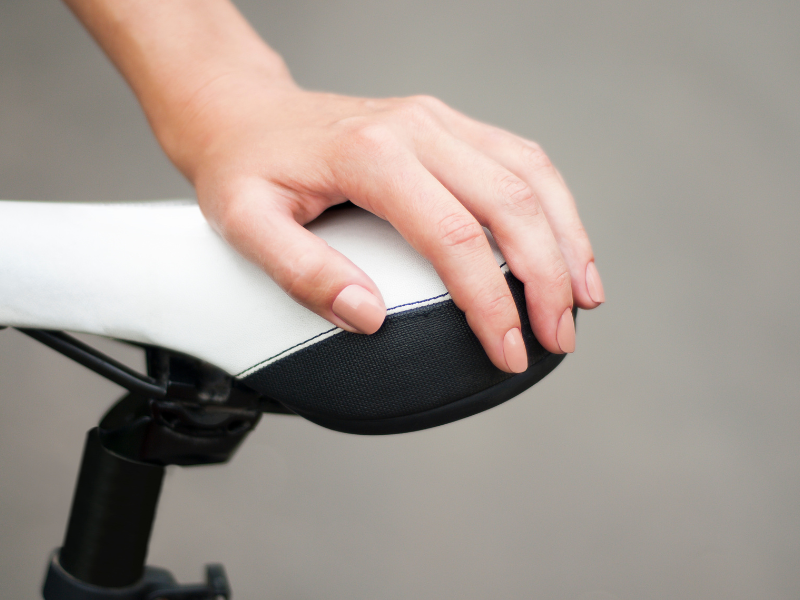
Nicht nur, dass ein falsch eingestellter Sattel den Fahrspaß extrem mindert, sondern er kann auf Dauer auch gravierende gesundheitliche Probleme verursachen – zum Beispiel Knie- und Rückenschmerzen.
Doch damit ist jetzt Schluss! Als begeisterter Radsportler habe ich über die Jahre viele Erfahrung gesammelt und zahlreiche Tipps und Tricks zur optimalen Sattelpositionierung erlernt. Diese Erfahrungen möchte ich mit dir teilen, um dir dabei zu helfen, das Beste aus deiner Sitzposition auf dem Fahrrad herauszuholen.
👉🏻 Schau dir hierzu auch gerne unser Video an, in dem dir Sebastian Schritt für Schritt erklärt, wie du deinen Fahrradsattel optimal einstellst

Warum es so wichtig ist, den Fahrradsattel richtig einzustellen
Prinzipiell stellst du beim Rennrad, Mountainbike, Trekkingrad und beim Ergometer den Fahrradsattel immer gleich ein. Denn was sich bei den Beinen abspielt, ist immer dasselbe. Die Sitzposition hingegen kann je nach Fahrstil etwas variieren. Dazu findest du unten weitere ausführliche Infos.
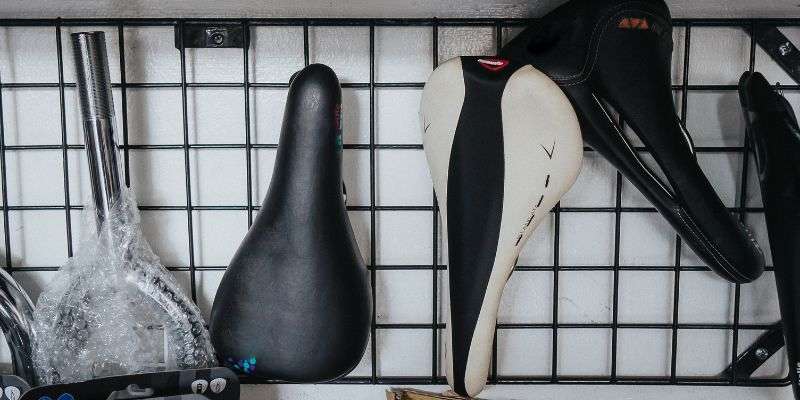

Fahrradsattel einstellen Werkzeug und zusätzliche Hilfsmittel
- Innensechskantschlüssel (Inbusschlüssel): Diesen benötigst du für die meisten modernen Fahrräder. Die Größe variiert je nach Modell und Schraubenart.
- Schraubenschlüssel oder Torx-Schlüssel: Je nach Schraubentyp an deinem Sattelgestell oder der Sattelstützenklemme.
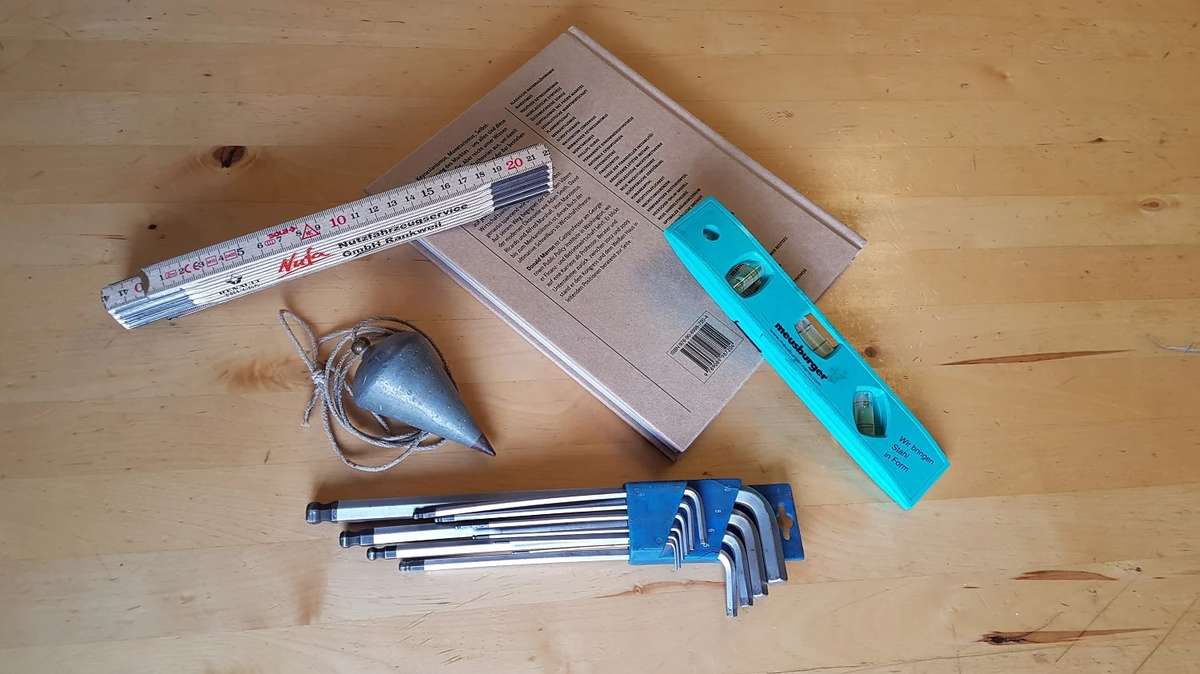
- Wasserwaage: Um die Sattelneigung exakt auszurichten.
- Pendel (alternativ Garn oder dünner Schnürsenkel mit Bleigewicht): Zur Überprüfung der horizontalen Sattelposition.
- Buch und Zollstock/Maßband: Für die Berechnung der optimalen Sattelhöhe.
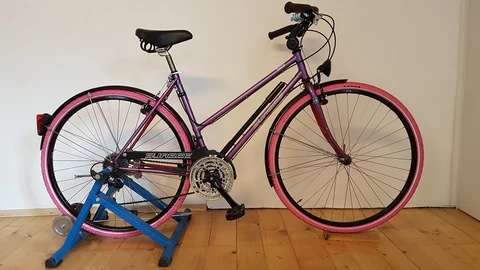
Schritt-für-Schritt-Anleitung: Sattelhöhe einstellen
Wenn du das Satteleinstellen richtig machen möchtest, dann empfehle ich dir die Berechnung mit der Formel. Diese ist im Vergleich zur Fersenmethode etwas zeitaufwändiger, dafür aber genauer. Meine Erfahrungen zeigen jedoch, dass in der Praxis beide Methoden zum Einstellen der Sattelhöhe gut funktionieren.
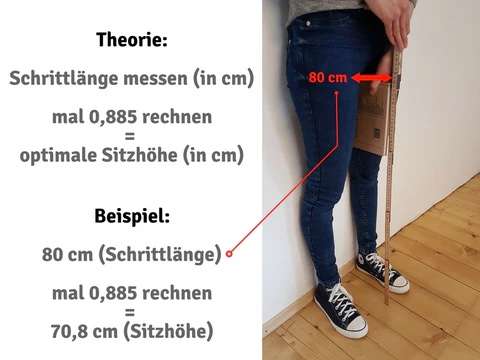
- Stelle dich mit deinem Rücken gerade an eine Wand. Ich empfehle dir eine leicht breitbeinige Stehposition. Deine Beine sollte ca. 20 Zentimeter auseinanderstehen.
- Mit dem Buch (siehe Bild) fährst du dann zu deinem Schritt hoch, bis es ansteht.
- Miss dann mit einem Zollstock oder Maßband die Länge vom Boden bis zur höchsten Stelle des Buchs.
- Diesen Wert in Zentimeter multiplizierst du mit dem Wert 0,885.
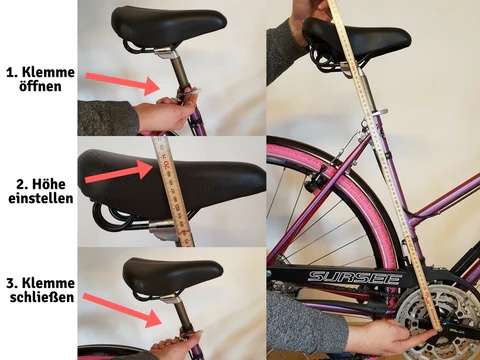
- Das Ergebnis ist dann deine optimale Sattelhöhe – also von der Tretlagermitte bis zur Oberkante des Sattels.
Schritt-für-Schritt Anleitung: Sattelneigung einstellen
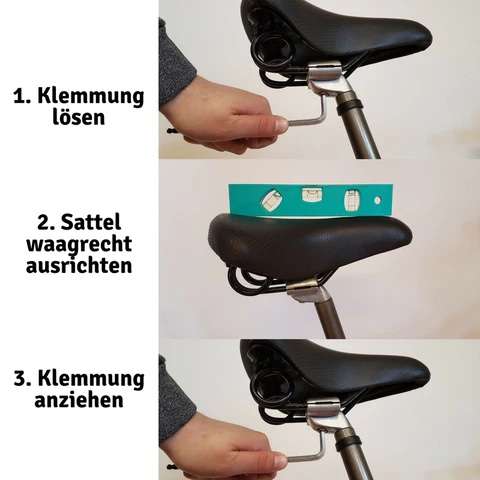
- Löse die Sattelklemmung an der Sattelstütze, bis die Sattelneigung verstellt werden kann.
- Lege eine Wasserwaage auf den Sattel.
- Verändere den Winkel des Sattels, bis er komplett waagerecht, also im Wasser, ist.
- Ziehe die Sattelklemmung wieder fest an.
- Optional: Zur Entlastung des Dammbereichs die Sattelspitze etwas absenken.
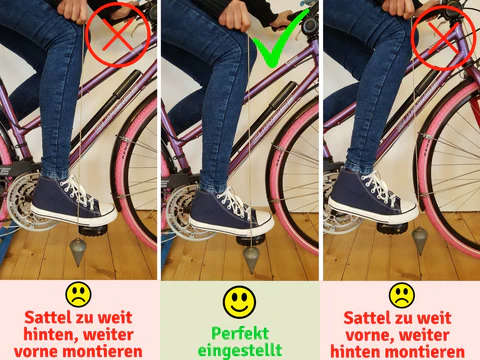
- Setze dich auf dein Fahrrad und positioniere die Kurbel so, dass sie waagerecht ist und der Kurbelarm nach vorne zeigt.
- Die Kurbel als Ganzes sollte in einer waagerechten Linie stehen.
- Wenn du Klickpedale hast, führe die Methode im eingeklickten Zustand durch. Bei normalen Pedalen platziere die Mitte der Pedalachse auf deinem Fußballen.
- Halte ein Pendel (z.B. einen Schnürsenkel mit einem kleinen Gewicht) am Schienbeinköpfchen an.
- Achte darauf, dass der Pendelfaden durch die Mitte der Pedalachse geht.
- Ist das Pendel zu weit vorne, muss der Sattel nach hinten verschoben werden.
- Befindet sich das Pendel hinter der Pedalachse, muss der Sattel weiter nach vorne.
- Justiere die Position des Sattels in kleinen Schritten und überprüfe die Pendelposition erneut.

Zusammenfassung meine 7 Tipps
Fahrradsattel einstellen – Fazit
Eine falsche Sattelposition kann langfristig zu Knie- und Rückenschmerzen sowie zu anderen gesundheitlichen Beschwerden führen. Daher ist es wichtig, die Sattelhöhe und -neigung genau zu justieren. Nimm dir die Zeit für diese Anpassungen und trage deine normale Radfahrkleidung, um unter realistischen Bedingungen zu arbeiten. So kannst du zukünftig jede Fahrradfahrt schmerzfrei und in vollen Zügen genießen.
👉🏻 Übrigens, falls du noch mehr geballtes Fahrradwissen haben möchtest, kommen hier meine weiteren Leseempfehlungen: Fahrradschlauch flicken: einfach Anleitung mit Video, Fahrrad aufpumpen – so geht´s richtig und Fahrradreifen wechseln.

Wir lieben Radfahren!
Du möchtes mehr Fahrrad-Wissen von passionierten Experten? Dann schau in unserem Blog vorbei!
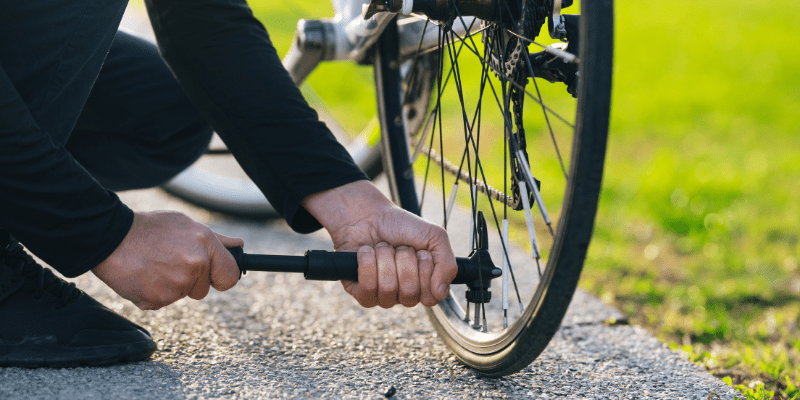

In unserem Onlineshop findest du auch die richtige Fahrradpumpe für dich!
zu den Fahrradpumpen
Table of contents
Adjust saddle height
- The calculation
- The heel method
Adjust saddle position
- The pendulum method
The right sitting position for every bike
Why it is so important to adjust the saddle correctly
Required tools
To adjust your saddle height/saddle angle correctly, you need an Allen key, a wrench, or a Torx. Which one you need depends on the screws in the saddle clamp and seat post clamp. If your bike has a quick release on the seat post clamp, you don't need any tools.

In addition, you will need a spirit level, a pendulum, a piece of yarn or a thin shoelace with a lead weight. You will need a book and a tape measure for the calculation.
If you have a roller trainer at home to clamp your bike onto, it will make adjusting the bike saddle easier. Then you and your bike won't have to lean against anything. Of course, it also works without a roller trainer.

If you are using a roller trainer, you should put something underneath your bike tire. For example, a small board that brings your front tire to the same height as the rear tire is suitable for this. This is important so that your bike is completely parallel to the ground.
Regarding your clothing: It is best to wear the shoes and trousers that you wear when cycling.
Adjust saddle height
There are 2 ways to adjust the height of your bicycle saddle. You can choose the appropriate Calculate height either or the heel method The heel method is, in contrast to the calculation, a little less accurate, but faster. In practice, both methods work well.
The calculation

To do this, stand with your back straight against the wall. It is best to stand with your legs slightly apart and your feet about 20 centimeters apart. Then move the book up to your crotch until it is touching. Then measure from the floor to the highest point of the book. Multiply this value in centimeters by 0.885. The result is your optimal seat height, from the center of the bottom bracket to the top edge of the saddle.

To adjust your saddle to this height, first loosen the seat post clamp, measure your height and adjust your saddle to this height. Finally, tighten the seat post clamp again.
The heel method

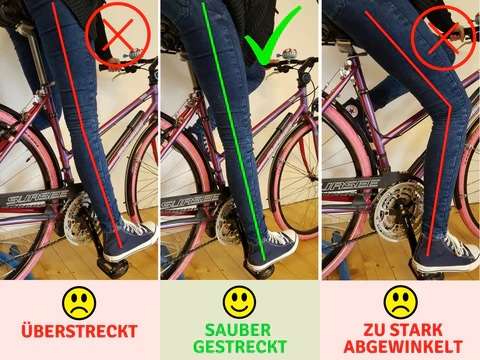
For this method, sit on your bike and place your heels on the middle of the pedals. At the optimal saddle height, your leg should be comfortably stretched out with the cranks in line with the seat tube. However, it is important not to stretch them out completely or even overstretch them. Your hips should not move on the saddle and should remain horizontal.
If this is not the case, you should change the saddle height as described above. If your leg is too straight, your saddle is too high and you should lower it a little. If your leg is bent, raise your saddle a few centimeters.
Take a test ride afterwards and you will feel comfortable pedalling :)
Adjust saddle angle

First, loosen the saddle clamp on the seat post until the saddle angle can be adjusted. Or rather, until it can be moved. Then place a spirit level on the saddle and change the angle until it is completely horizontal, i.e. in the water. Finally, tighten the saddle clamp again. To relieve pressure on the perineal area, you can lower the tip of your saddle a little.
Adjust saddle position
If the saddle is further forward, it is optimal for an upright position. If you are further back, you will ride more stretched out. You can find out which saddle position is best for you using the pendulum method.
The pendulum method

To adjust it correctly, sit on your bike so that the crank is horizontal on one leg. The crank arm must be facing forward. The crank as a whole should be horizontal. If you have clipless pedals, you should do this with the pedals clipped in. If you don't have clipless pedals, you should have the center of the pedal spindle on the ball of your foot.
Then you place the pedal on the head of the shinbone, and the pendulum thread should go through the middle of the pedal axle. If the pendulum is too far forward, then the saddle must go back, i.e. further back. If the pendulum is behind the pedal axle, then the saddle must go further forward. If there is not enough space to the front and back, then you can help yourself with a straight or bent seat post.
The right sitting position for every bike
It doesn't matter what type of bike you're riding. In principle, you always adjust the saddle the same way on a racing bike, mountain bike, trekking bike or ergometer. Because what happens to your legs is always the same. The sitting position, however, can vary slightly depending on your riding style.
To adjust everything correctly, it is best to do two complete runs. Starting with adjusting the saddle height and ending with the pendulum method.
Why it is so important to adjust the saddle correctly
On the streets, it is very noticeable that many cyclists are sitting in the wrong position on their bike. Many people have the wrong seat height and/or the wrong saddle position.
This is particularly damaging to the body of people who cycle a lot. You could compare it to marathon runners who wear dancing shoes the whole time they are running. The wrong position on the bike is just as unhealthy. It is not good for the joints in the long term and the muscles are put under the wrong strain. This means that you should take the time to adjust your bike correctly.
Did you like the blog post? Rate us or write a comment :)
Have a look at our Bicycle accessories shop : TO THE SHOP
You want Bicycle news + current promotions from us? → Subscribe to newsletter
You are more on Facebook on the go? → HiLo sports on Facebook
follow us on Instagram ! → HiLo sports on Instagram
You prefer to look Videos ? → HiLo sports YouTube channel


